What is the Vundo Trojan?
The Vundo Trojan is malicious code that installs itself into a computer, launches pop-up advertisements, and secretly downloads other harmful files into your system. Once you are on the Internet, the Vundo trojan initiates many pop-ups, and thus it slows down your system considerably.
The Vundo trojan is disseminated by way of e-mails which incorporate website links. These links then exploit the weak points within the security system of your web browser. Receiving a Vundo-infected e-mail, and clicking on the e-mails associated links, results in your Internet browser opening a website which discreetly installs the malware into your computer. In addition, Vundo may also become active every time you start up Windows. As the trojan infiltrates infiltrates your system, the code (as well as the code creator) may alter system settings, steal passwords and other important information, delete files, and observe your computer activity.
The Vundo Trojan Manual Removal Process
Back up the system and the registry before doing anything else. This step is integral to restoring your settings should anything go awry.
Removing the Vundo Trojan manually necessitates the deletion of the Vundo files within your system. First, you need to remove the following Vundo registry values:
• HKEY_CURRENT_USER\Software\Microsoft\Internet Explorer\Main\Active State
• HKEY_CURRENT_USER SoftwareMicrosoftWindows CurrentVersionRunOnce*WinLogon
• HKEY_LOCAL_MACHINE SoftwareMicrosoftWindows CurrentVersionRunOnce*[filename]
• HKEY_CLASSES_ROOTCLSID{2316230A-C89C-4BCC-95C2-66659AC7A775}
• HKEY_CLASSES_ROOTCLSID{8109AF33-6949-4833-8881-43DCC232B7B2}
• HKEY_LOCAL_MACHINE SOFTWAREClassesATLEvents.ATLEvents
• HKEY_LOCAL_MACHINESOFTWAREClassesATLEvents.ATLEven ts.1
• HKEY_LOCAL_MACHINE SOFTWAREClassesCLSID{02F96FB7-8AF6-439B-B7BA-2F952F9E4800}
• HKEY_LOCAL_MACHINE SOFTWAREMicrosoftWindows CurrentVersionExplorerBrowser Helper Objects{02F96FB7-8AF6-439B-B7BA-2F952F9E4800}
• HKEY_LOCAL_MACHINE SOFTWAREMicrosoftWindows CurrentVersionExplorerBrowser Helper Objects{2316230A-C89C-4BCC-95C2-66659AC7A775}
• HKEY_LOCAL_MACHINE SOFTWAREMicrosoftWindows CurrentVersionExplorerBrowser Helper Objects{8109AF33-6949-4833-8881-43DCC232B7B2}
• HKEY_CURRENT_USER SoftwareMicrosoftInternet ExplorerMainActive State
Note that with the aforementioned Vundo files, the user profile is a variable which refers to the profile folder of the current user. With Windows XP, the default should be C:\Documents and Settings\[Current User], for example: C:\Documents and Settings\StanWinston.
Vundo Trojan File Removal
Remove the Vundo Trojan files manually only if you have proper knowledge in modifying your system, as this concerns a bit of risk.
To delete Vundo files within Windows Vista and XP OSs:
Access the Windows Start Menu, and click on ‘Search’. The system will inquire (through a pop-up panel) what you wish to look for. Click on the ‘All files and Folders’ option. Enter a Vundo Trojan file inside the search bar, and then select ‘Local Hard Drives’. Activate ‘Search’. Erase the file once it is identified.
To halt the Vundo Trojan processes:
Access the Windows Start Menu, and click on ‘Run’. Within the command bar, enter ‘taskmgr.exe’ and click on ‘Ok’. Another way of launching the Task Manager is via pressing ‘Ctrl + Shift + Esc’ simultaneously. Go to the Processes tab, and look for the Vundo trojan processes. Once the associated processes are identified, right-click on these. Choose the End Process option.
Vundo Trojan Registry Key Removal
Again, back up the registry before altering any of its contents. The registry is an integral part of the Windows system. Users who lack know-how in terms of modifying their systems may have to reinstall the whole system if they do delete or change a critical value or registry key.
Start by accessing the Windows Start menu and clicking on ‘Run’. Enter ‘regedit’ into the bar that appears, and click on ‘Ok’ to access the Registry Editor.
The Registry Editor will be displayed as a dual-paned window. One side of the Registry Editor window allows the user to choose different registry keys, while the other shows the registry values of the chosen registry keys.
Go to ‘Edit’, and then to ‘Find’, to identify and locate a registry key. Type any of the registry keys within the search bar.
Once the Vundo trojan registry key is displayed, it can be deleted. Right-click on the key, choose the Modify option, and click on ‘Delete’.
Vundo Trojan DLL File Deletion
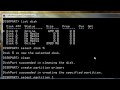
Identify the Vundo DLL files you wish to delete. Go to the Windows Start Menu, and clicl on ‘Run’. Enter ‘cmd’ within the Run bar, and click on ‘Ok’.
Change the current directory by entering ‘cd’ within the command box. Press the spacebar, and type in the full directory which has the Vundo DLL files. Type in ‘dir’ in the command box to show the directory contents if you are unsure as to the location of the Vundo DLL files. Go back one directory by going to the command box, typing ‘cd’, and clicking on ‘Enter’.
Once the Vundo DLL file you wish to remove has been located, enter ‘regsvr32 /u DLLName.dll, wherein the DLL name is variable (‘regsvr32 /u a1script.dll’ for example). Press the Enter key.
Other Settings
If the Vundo Trojan changed your browser’s homepage, follow the steps below:
Access the Windows Start Menu, go to the Control Panel, and click on ‘Internet Options’.
Go to the General tab. The Home Page portion has an entry bar for the URL you wish to assign for your home page. Enter the URL. Select the ‘Apply’ option, and click on ‘Ok’.
Click on your Internet browser shortcut, and this will open a new web page. Check if your set default home page appears.


 Windows: How to Remove the Vundo Trojan