Not satisfied by your default brushes in Photoshop?Want to have your own copyright?

Then make yourself one! It's very easy and simple. Just follow the next few steps:
Step 1:
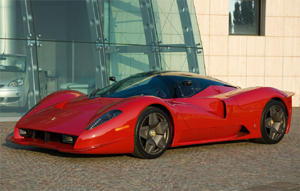
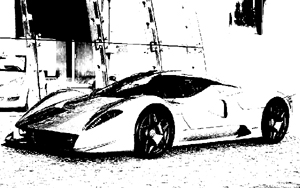
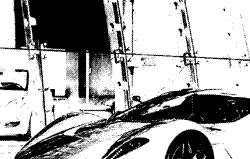
Pick an image, whatever you want. An object, a building, a flower, whatever comes to your mind first. Go to some good photo site and download the image you choose, or even better, download several ones so you will have much more material to work with. Here, I will be using a beautiful red Ferari
Step 2:
Use STRL+U to change colour into black and white by decreasing the values of Hue and Saturation to their minimum. The same effect you can achieve with using the path Image>Mode>Greyscale. Next go to Image>Adjustments>Brightness and contrast. Here you can make the adjustments by your taste.You can make it darker or brighter,with more or less contrast. For this image, I used maximum contrast and added some brightness.
Step 3:
Use the Lasso tool (L) to make selection,choosing the future appearence of the brush.Using this tool, you are picking the shape of the brush. Everything depends on your choise and your taste.
Step 4:
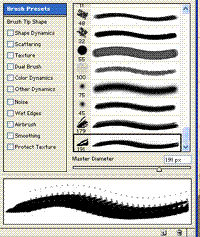
Go to Edit>Define brush, where you can pick the name of the brush.You will be given default name for the brush, but it is not necessary to choose that one. You can write any name you want in the box that will open.
By clicking OK you've created your new brush. You can see it at the lowest part of your brush window.
Good job!I bet you are surprised how simple and easy it was! Your new brush has just been created. All you have to do now is use your imagination and create as many new fresh and never before seen images. So get down to business and good luck!!!


 Create your own brush in Photoshop