One of the more popular firewall products for the small business market is the
Cisco PIX 501. Out of the box it requires just a few configuration entries and you are up and running.
In this guide, we will walk through the steps for configuring your brand new pix at the network edge.
This guide is written for the user who has no knowledge of the PIX firewall. As such, it is not a treatise on network security, but a quick, by-the numbers guide to configuring a PIX firewall with as little jargon as possible.
We are assuming that you have an internet connection with at least one static IP address. While the PIX can easily handle a dynamic IP address (that is the default configuration), you won’t be able to easily configure remote access, VPNs, Mail, or web servers without a static IP address.
Your PIX should have come with an AC adapter, a yellow CAT 5 cable, an orange CAT5 cable and a flat, (typically) baby blue cable with a 9-pin serial connector on one end and an RJ-45 plug on the other.
The yellow CAT5 cable is a standard Ethernet cable and is used to connect your pc or server to the 4-port Ethernet switch built into the PIX. The Orange CAT5 cable is a cross-over cable and may be required to connect the outside interface of the PIX to your ISP’s router (if your PC’s or workstations are plugged into a Cisco switch inside the network, you will also require a cross-over cable for connecting to one of the switch ports on the PIX).
What we are going to use for our configuration is the baby blue rollover cable. Insert the serial jack into one of the serial ports on the back of the PC or laptop you will be using to configure the PIX. Then, insert the RJ-45 plug into the port on the back of the PIX labeled “console.”
Windows has a built in application that is used for (among other things) configuring serial devices. Using the start menu, go to
Start > Programs > Accessories > Communications > Hyper Terminal.
Choose the
Hyper Terminal application. You may get a dialog box asking if you’d like to make Hyper Terminal your default telnet application. Unless you have a preference, go ahead and choose yes.
Then you will be asked for the area code from which you are dialing, although it isn’t applicable here, the program still wants to know, so fill it in and click ‘
next’ or ‘
ok.’
You can call the connection anything you’d like; in this example we’ll use PIX. Click ‘
ok’ to move on.
Next, we’ll be asked to enter the details for the phone number we’d like to dial. Since we aren't dialing a phone number, use the drop-down selector at the bottom of the box to choose COM1 or COM2 (whichever is applicable). If you have no idea which one is which, you may need to try it both ways.
Now, you will be expected to tell the application some specifics about the port settings so that it can effectively communicate with the PIX.
Luckily, it isn’t too complex, just remember
9600, 8, none, and
1. Enter these settings into the drop down selectors of the box on your screen.
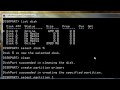
Now we are ready to set up the PIX. Insert the power cable and you will be greeted with the startup monologue (it’s not a dialog in this case; it’s just informing you of what is occurring).
Then, you will be greeted with a screen that asks if you’d like to program the PIX using interactive prompts. For the purpose of this exercise, type no and click ‘
enter’.
You will now get a prompt that looks like this:
pixfirewall>
Type the word ‘
enable’ (no quotes), when prompted for the password, just click ‘
enter’ as the default is no password.
The prompt has changed to a hash mark:
Pixfirewall#
Type the phrase ‘configure terminal’ (no quotes); you are telling the PIX that you want to enter the global configuration mode and you will be doing your configuration via the terminal window.
Your prompt will now look like this:
pixfirewall(config)#
The first thing we want to do is give your pix a host name. The PIX command syntax is:
Variable name
Thus, to set the hostname we will enter:
pixfirewall(config)# hostname mypix
Now, the domain name; it’s alright if you don’t have a domain set up on your network, you can call it whatever you like. However, give some thought to whether a domain might be a possibility at some point and plan your naming scheme appropriately.
pixfirewall(config)# domain-name mydomain.com
As you can see from the configuration above, the ethernet0 interface is the outside interface, with a security setting of 0, while ethernet1 is the inside interface with a security setting of 100. Additionally, you can see that the interfaces are shutdown. All we need do to bring them up is enter the speed at which they should operate. As they are Ethernet interfaces, any software version after 6.3(3) will take 100full, prior to that, use 10full.
pixfirewall(config)# interface ethernet0 100full
pixfirewall(config)# lnterface ethernet1 100full
Now to assign an address to the inside and outside interfaces; the ip address command sets the ip address of an interface. The syntax is as follows:
Ip address
An example might be as follows:
Ip address outside
pixfirewall(config)# ip address outside 12.25.241.2 255.255.255.252 (this IP address, netmask combination should not be used, it is shown here for example only. Use the IP address/mask given to you by your ISP).
Then the inside IP address
ip address inside
pixfirewall(config)# Ip address inside 192.168.0.1 255.255.255.0
A brief word about IP addressing is in order here.
One way that is used to conserve public IP addresses is through the use of non-routable IP addressing blocks specified in RFC 1597. You may sometimes hear them referred to as “
private” IP addresses, which is fine, but not quite technically accurate. There are three different blocks to choose from:
10.0.0.0 – 10.255.255.255 with a netmask of 255.0.0.0
172.16.0.0 – 172.31.255.255 with a netmask of 255.255.0.0
192.168.0.0 – 192.168.255.255 with a netmask of 255.255.255.0
as long as your internal network's IP addresses are all within one of those blocks of address space, you will not need to introduce the complexity of routing within your LAN. An example scheme for those who are not familiar is shown below:
PIX – 192.168.0.1 netmask 255.255.255.0
File/DHCP server – 192.168.0.2 netmask 255.255.255.0
Workstations – 192.168.0.10 – 192.168.0.254 netmask (each) 255.255.255.0
* I intentionally skipped over the 192.168.0.3-9 addresses to plan for future expansion and the possible need for additional servers, you don't have to do this.
* Configure your DHCP server to hand out addresses in the specified block using your ISP-provided DNS servers for name resolution. Make sure to change this should you ever decide to install a name server within your own network.
* If you don't want to set up a DHCP server, just configure each PC with the IP address, default gateway, netmask & DNS servers
It is very important now to add a default route to the PIX configuration. Another term for default route is the “
default gateway.” You need to tell the PIX that if it receives traffic destined for a network that isn’t directly connected, it should send it to the connected ISP router. Your ISP should have given you the IP address of your default gateway when you received your setup information.
Here is the syntax: Route
The English translation is “if packets destined for interface on the network specified by network address are bounded by mask then route it via a next hop at the optional command is used to give an indication of distance.
For example pixfirewall(config)# Route outside 0 0 <12.25.241.1> 1
(if packets are destined outside the network to any ip address with any netmask, send them through the ISPs default gateway, which is one hop away, meaning it is the device to which the PIX is connected on the outside interface).
To password protect your PIX in order to prevent unauthorized access, use something that is secure and hard to guess. Try to stay away from the names of spouses, children, pets, birthdays or other easily guessed variable. Whenever possible, use a combination of letters and numbers. The syntax is as follows (but please don’t use cisco as your actual password)
pixfirewall(config)# Passwd cisco (note the abbreviated spelling of the word password) this will set a password for basic access (rembember the pixfirewall> prompt?)
pixfirewall(config)# Enable password cisco this will set the password for administrative access
Now that your PIX has been given a basic configuration, you should be able to access the internet, while preventing unauthorized access to your resources.
Ron Jones is the Founder and President of The Fulcrum Technology Group, Inc.
www.fulcrumtechnologygroup.com Located just North of Atlanta, this consulting firm specializes in business technology solutions that will enable you to maintain a competitive advantage by increasing productivity, improving reliability and reducing expenses.